# Central Authentication Service (CAS) - ADFS集成配置
CAS和ADFS集成的配置。参考文档:
# 需要注意的点
# 配置
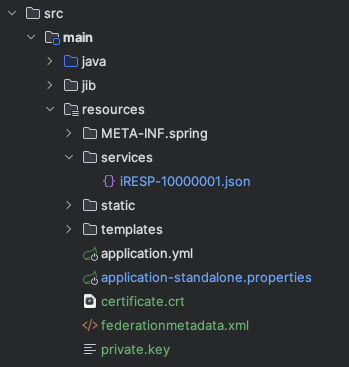
在 src/main/resources 中新建一个配置文件application-standalone.properties。需要注意下面几项的配置:
- identity-provider-url:从ADFS配置中获取
- identity-provider-identifier:来自于ADFS。
注意必须是http。(这里应该是和下面的xml文件里的entityID相对应) - relying-party-identifier:ADFS中添加信赖方依赖。注意协议是webFed,且证书应该是上面配置文档里面提到的生成密钥和证书
- cas.authn.wsfed[0].cookie.crypto.encryption.key:这个必须是256?512?源码里给的例子的长度不够,下面的长度是够的。
- signing-certificate-resources:可以直接引用adfs的web地址:https://adfs.iresp.com/federationmetadata/2007-06/federationmetadata.xml,但前提是一定要确认在docker里可以curl到这个地址,如果证书不对,可能就会失败。可以像下面的例子里一样,将此文件写到war包里
# ADFS -------
cas.monitor.endpoints.endpoint.defaults.access=ANONYMOUS
management.endpoints.web.exposure.include=*
management.endpoints.enabled-by-default=true
cas.server.name=https://sso.iresp.com:8443
cas.server.prefix=${cas.server.name}/cas
cas.audit.engine.enabled=true
logging.level.org.apereo.cas=trace
#cas.service-registry.core.init-from-json=true
#cas.service-registry.json.location=file:${PWD}/ci/tests/puppeteer/scenarios/${SCENARIO}/services
cas.tgc.crypto.encryption.key=u696jJnPvm1DHLR7yVCSKMMzzoPoFxJZW4-MP1CkM5w
cas.tgc.crypto.signing.key=zPdNCd0R1oMR0ClzEqZzapkte8rO0tNvygYjmHoUhitAu6CBscwMC3ZTKy8tleTKiQ6GVcuiQQgxfd1nSKxf7w
cas.webflow.crypto.signing.key=v43dwqO_GbGSVsFqgPFpVdwdMSEunMUzc4QSF13x18kInHPeRuvntleljO5Y5cKqDGAFe1vv10mM4tpyoKyBBA
cas.webflow.crypto.encryption.key=2PikjfOKY6n8Bbux2cy-Hg
cas.authn.attribute-repository.stub.attributes.uid=casuser
cas.authn.attribute-repository.stub.attributes.lastname=User
cas.authn.attribute-repository.stub.attributes.firstname=CAS
cas.authn.wsfed[0].cookie.crypto.encryption.key=wjDVCGIx5ztrk9vKI55YIP01SLE4Ziaj0WsfjvVIaAEwjDVCGIx5ztrk9vKI55YIP01SLE4Ziaj0WsfjvVIaAE
cas.authn.wsfed[0].cookie.crypto.signing.key=BXI9U68k1OYJ-vgCvqtZHLPhkCCiAWWfGiqHWdBVF7hXsvgLD1WQHgHbUYee039w7KXux7zfRpBDBeq6K3jfUg
cas.authn.wsfed[0].identity-provider-url=https://adfs.iresp.com/adfs/ls/
cas.authn.wsfed[0].identity-provider-identifier=http://adfs.iresp.com/adfs/services/trust
cas.authn.wsfed[0].relying-party-identifier=urn:iresp:cas2
cas.authn.wsfed[0].name=adfs.iresp.com
cas.authn.wsfed[0].id=ADFS
cas.authn.wsfed[0].tolerance=PT60S
cas.authn.wsfed[0].identity-attribute=upn
cas.authn.wsfed[0].signing-certificate-resources=classpath:federationmetadata.xml
cas.authn.wsfed[0].attributes-type=BOTH
cas.authn.wsfed[0].attribute-resolver-enabled=true
cas.authn.wsfed[0].auto-redirect-type=SERVER
#cas.authn.wsfed[0].attribute-mutator-script.location=file:${PWD}/ci/tests/puppeteer/scenarios/${SCENARIO}/WsFedAttrs.groovy
cas.authn.wsfed[0].attribute-mutator-script.location=file:/etc/cas/config/WsFedAttrs.groovy
# 密钥和证书
官方的集成文档里提到了怎么做密钥和证书:
openssl genrsa -out private.key 1024
openssl rsa -pubout -in private.key -out public.key -inform PEM -outform DER
openssl pkcs8 -topk8 -inform PEM -outform DER -nocrypt -in private.key -out private.p8
openssl req -new -x509 -key private.key -out x509.pem -days 365

# convert the X509 certificate to DER format
openssl x509 -outform der -in x509.pem -out certificate.crt
遵循这里的方法生成的private.key和certificate.crt是很重要的。这两个文件和ADFS的federationmetadata.xml文件要一起打在war包里。同时,在ADFS中添加信赖方依赖时,要使用这里的证书:certificate.crt。
# 关于证书
ADFS的域名证书
CAS SSO的域名证书
web应用的域名证书
这三者的证书最好是相互都认的。尤其,如果CAS跑在docker里,一定要确认是docker容器里面安装证书。
# ADFS中添加信赖方依赖
添加依赖时要注意的几个点:
- 终结点是web-federation被动类型,值参考:
https://sso.iresp.com:8443/cas/login?service=https%3A%2F%2Fdaf0-123-119-239-72.ngrok-free.app%2F。注意最后必须是%2F,原因不明。 - 加密证书必须是上面生成的证书。
- 信赖方信任标识符类似于这样:urn:iresp:cas2
- 别忘了最后一步的添加声明规则
# Tomcat和nginx配置
如果是配置CAS在tomcat中运行并经过nginx代理,建议tomcat配置为https,同时nginx也是https,且nginx要配置透传:
location / {
    client_max_body_size 500M;
    proxy_redirect          off;
    proxy_set_header Host $http_host;
    proxy_set_header Upgrade $http_upgrade;
    proxy_set_header Connection "upgrade";
    proxy_set_header Referer $http_referer;
    proxy_set_header Cookie $http_cookie;
    proxy_set_header X-Real-IP $remote_addr;
    proxy_set_header X-Forwarded-For $proxy_add_x_forwarded_for;
    proxy_set_header X-FORWARDED-HOST $server_addr;
    proxy_set_header X-FORWARDED-PORT $server_port;
    proxy_read_timeout 6000;
    proxy_connect_timeout 600;
    proxy_pass   https://localhost:8443/;
}
配置参考文档:
https://jingyan.baidu.com/article/925f8cb8d1b503c0dde0569b.html